
Searching for videos of flux core welding on homemade car panels makes sense — watching someone actually run a bead on thin sheet metal teaches technique faster than any written description. But not every video out there reflects good practice, and that gap can cost you hours of rework.
Flux core welding (FCAW) can be used on homemade car body panels, but it requires careful heat management, correct polarity, clean metal, and realistic expectations. Most automotive sheet metal runs between 18 and 22 gauge (roughly 0.8–1.2 mm), which sits at the lower edge of what gasless flux core wire handles well. The process produces more heat and spatter than MIG with shielding gas, which makes burn-through and distortion genuine risks on thin panels. Good tutorial videos focus on short stitch welds, proper settings, and post-weld cleanup — not long continuous runs.
What These Videos Are Actually Showing You
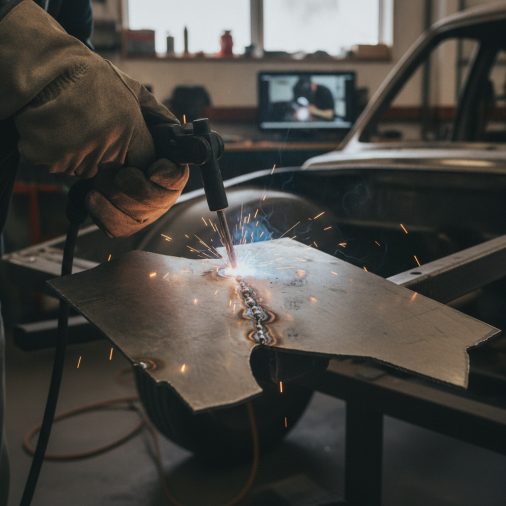
The majority of popular videos covering homemade car panel welding with flux core fall into a few categories: rust repair patches, floor pan replacements, quarter panel sections, and rocker panel fabrication. Most creators are working with standard mild steel sheet metal cut from donor panels or new sheet stock.
What separates useful videos from misleading ones is how the welder handles heat. Thin sheet metal warps quickly, and a creator who runs long continuous welds without discussion of distortion control is teaching a method that will frustrate most viewers on their first attempt.
Look for videos that demonstrate stitch welding — short tack sequences spaced around the joint rather than one unbroken pass. That approach is what actually works on panels thinner than 1.5 mm.
Why Flux Core Gets Used on Car Panels (and Where It Falls Short)
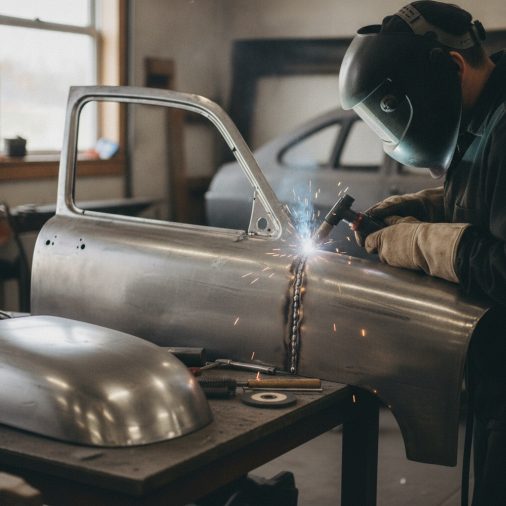
Flux core wire is self-shielded, meaning it generates its own gas protection from the flux inside the wire rather than requiring an external gas cylinder. That makes it more portable and less expensive to set up, which explains its appeal for garage fabricators.
The trade-off is meaningful. Gasless flux core — typically E71T-GS wire — runs hotter and produces more spatter than solid MIG wire with a 75/25 argon/CO₂ mix. On metal thicker than 3/16 inch, that extra heat is less of a problem. On 18–22 gauge body panels, it demands real care. Controlling heat when welding thin metal with flux core is one of the most discussed challenges in this type of work, and the better tutorial videos address it directly rather than glossing over it.
Dual-shield flux core wire (which requires external shielding gas) is smoother and easier to control on thin material, but most homemade car panel videos use self-shielded wire for the simplicity.
What Good Tutorial Videos Get Right
When evaluating a video before following its technique, these are the signs the creator knows what they are doing:
– Short stitch welds — 1/2 to 1 inch long, with cooling between passes
– Backing material or copper backer for gap control on patches
– Clean, ground metal at the joint — no rust, paint, or mill scale
– Correct polarity — self-shielded flux core typically runs DCEN (electrode negative), the opposite of solid MIG wire
– Wire diameter discussion — 0.030 inch wire is generally better suited to thin panels than 0.035 inch
– Distortion control — alternating tack locations rather than welding one direction
– Slag removal between passes — flux core leaves a slag layer that must be chipped before the next pass
A creator who does not mention polarity when switching between solid wire and flux core wire is worth approaching with caution. Polarity directly affects arc stability, penetration, and spatter on FCAW, and torch direction in flux core welding also differs from solid wire practice.
Realistic Settings for Thin Panel Work
No single setting works across all machines, wire types, and panel thicknesses. That said, here is a practical starting reference for self-shielded E71T-GS wire on common body panel gauges:
| Panel Thickness | Wire Diameter | Approximate Voltage | Approximate WFS | Polarity |
|---|---|---|---|---|
| 22 ga (0.8 mm) | 0.030 in | 13–15 V | 150–200 IPM | DCEN |
| 20 ga (0.9 mm) | 0.030 in | 14–16 V | 175–225 IPM | DCEN |
| 18 ga (1.2 mm) | 0.030 or 0.035 in | 15–17 V | 200–250 IPM | DCEN |
These values are starting ranges only. Your machine’s door chart and the wire manufacturer’s data sheet are more reliable than any third-party reference. A welder like the Lincoln Electric Weld-Pak 140 HD includes printed settings guidance specifically formatted for common wire and thickness combinations, which gives a useful baseline before experimenting.
The better videos do not copy settings from another machine — they show the creator reading their own machine chart, making a test bead on scrap metal of the same gauge, adjusting based on bead appearance, and only then moving to the actual panel.
Preparation Steps That Make or Break the Weld
Many home-fabrication videos skip or rush preparation, and that is exactly where the weld quality is decided. Panel welding with flux core punishes poor fit-up and contaminated metal more than most other applications.
Before welding any panel section:
1. Cut the patch or panel section cleanly — a clean fit-up with a tight gap (ideally under 1/16 inch) prevents cold laps and burn-through
2. Grind or sand the weld zone to bare, shiny metal — at least 1 inch back from the joint on both pieces
3. Tack in multiple positions before running any continuous weld — this holds the panel in position and distributes heat
4. Plan your stitch sequence — alternate locations around the joint rather than moving in one direction
5. Allow adequate cooling between stitches — touching the metal with an ungloved finger (carefully) or watching for discoloration is a field method; an IR thermometer is more accurate
6. Remove slag before adding the next pass — use a chipping hammer and wire brush
For deeper guidance on the full process, the article on welding body panels with flux core covers fit-up, tacking strategy, and distortion management in detail.
Safety Considerations That Videos Often Underemphasize
Shorter online videos frequently skip safety discussion entirely. Before replicating what you see, take these risks seriously:
– Fumes from flux core wire and coated metal are more concentrated than those from solid MIG wire with gas. Painted or primed automotive panels release toxic fumes when heated. Always work with strong ventilation or forced-air extraction — a household fan pushing air toward you is not adequate.
– Auto-darkening helmet with a minimum shade 10 lens — flux core produces a brighter arc than some other processes at equivalent settings
– Fire risk is real in a vehicle context — fuel lines, carpeting, insulation, and wiring can all be in close proximity to where you are welding. Remove or shield combustibles before striking an arc
– Flame-resistant clothing, welding gloves, and appropriate footwear — flux core spatter travels farther than MIG spatter and lands hotter
Fume control in particular deserves more attention than most videos give it. Preventing welding fume inhalation is especially important when welding old automotive panels that may contain paint, body filler, or undercoating.
How to Get the Most from These Videos
Rather than following a single video as a step-by-step prescription, use several videos together to cross-reference technique, settings, and outcomes. Watch for what each creator does when something goes wrong — burn-through, excessive spatter, warped panels — and how they correct it.
Pay attention to videos that show the actual bead on the back side of the panel. That reveals penetration, burn-through risk, and real heat control in a way that front-surface shots alone cannot.
If a video uses a Lincoln Electric Weld-Pak 140 HD or a Hobart Handler 140 and your machine is a different brand or output range, do not copy voltage and wire-feed speed numbers directly. Use their technique and visual bead evaluation as your guide, then dial your own machine in using scrap of the same gauge before touching the car.
FAQ
Can flux core wire really weld automotive body panels without burning through?
Yes, but it requires tight settings, short stitch welds, and adequate cooling between passes. Self-shielded E71T-GS wire with 0.030 inch diameter gives you the best control on 18–22 gauge steel. Continuous runs on thin panels with flux core will almost always cause burn-through. The technique — not the wire — is what keeps thin panels intact.
What polarity should I use for flux core welding on car panels?
Self-shielded flux core wire (the gasless type used in most home fabrication videos) runs on DCEN — DC electrode negative. This is the opposite of solid MIG wire, which uses DCEP. Running the wrong polarity causes erratic arc behavior, excessive spatter, and poor penetration. Always check the wire manufacturer’s data sheet and your machine’s polarity switch before welding.
Is MIG welding better than flux core for homemade car panels?
For thin automotive sheet metal, solid MIG wire with a 75/25 argon/CO₂ shielding gas mix generally produces better results — less spatter, lower heat input, smoother bead appearance, and finer control at lower settings. Flux core is workable and many garage fabricators use it successfully, but it requires more attention to heat management and produces a rougher bead that needs more finishing work.
What wire diameter should I use for welding car panels with flux core?
For panel gauges between 18 and 22 gauge, 0.030 inch (0.8 mm) self-shielded flux core wire is the practical choice. It allows finer voltage and wire-feed adjustments at lower settings than 0.035 inch wire, which reduces burn-through risk on thin material. Check that your machine’s drive rolls and contact tip match the wire diameter you are using.
Why do my flux core panel welds look porous or rough compared to videos?
Porosity in flux core welds on panels usually comes from one or more of these: contaminated base metal (paint, rust, oil, or mill scale), wind or drafts disrupting the self-generated shielding, incorrect polarity, or wire that has absorbed moisture. Surface preparation is the most common cause. Grind the joint area to clean, bare metal before welding, even if it looks clean to the eye.
Do I need to grind flux core welds on car panels before applying body filler?
Yes. Flux core leaves a slag layer over the weld that must be fully removed before any finishing work. Use a chipping hammer and wire brush first, then grind flush with a flap disc (typically 40–60 grit) for body filler application. Attempting to skim filler directly over slag or high crowns leads to adhesion failure and cracking over time.
Are homemade car panel welds safe for structural areas of a vehicle?
Weld appearance alone does not confirm structural adequacy. Floor pans, sill sections, and areas tied to suspension mounting points or crash structures carry safety implications beyond cosmetic panel replacement. For non-structural panels such as outer skins, a well-executed weld is generally acceptable. For any area that affects chassis integrity or occupant safety, consult a qualified automotive fabricator or body shop before assuming a home weld meets the required standard.
The single most useful thing you can take from any flux core panel welding video is the stitch sequence and heat management strategy — not the exact settings. Settings vary by machine, wire brand, and panel thickness. Technique transfers. Work on scrap metal of the same gauge as your panel, dial in your machine until the bead looks consistent and the metal stays flat, then move to the real job. That is what the best videos are actually demonstrating, even when they do not say so directly.