
The Lincoln Electric AC 225 is one of the most common transformer-based stick welders you’ll find in home workshops and small fabrication shops. Simple as it is, getting the leads connected correctly and the plug wired safely makes the difference between a welder that performs well and one that trips breakers or creates a shock hazard.
The Lincoln AC 225 uses two welding lead connections — an electrode holder lead and a work clamp lead — plugged into the two output terminals on the front panel. There is no fixed polarity on an AC machine, so either lead can go into either terminal. The input power cord requires a dedicated 230-volt, 50-amp circuit with a proper NEMA 6-50 plug wired to the two hot lines and the ground.
What Comes With the Machine and What You May Need to Add
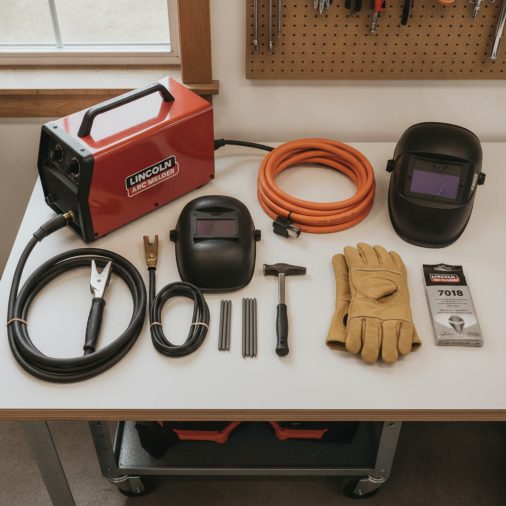
The Lincoln Electric AC 225 Arc Welder typically ships with an electrode holder (stinger), a work clamp (ground clamp), and welding leads already attached to both. Some versions include a power cord; others do not.
Check what your specific unit includes before purchasing anything extra. If the machine did not come with a power cord, you will need to wire one yourself or have a licensed electrician install a hardwired connection depending on your local codes.
The welding leads connect to the two large output lugs or posts on the front of the machine. These are sometimes labeled with a plus and minus symbol, but on an AC welder those symbols are functionally interchangeable because the current alternates with every cycle.
Electrical Requirements Before You Do Anything Else
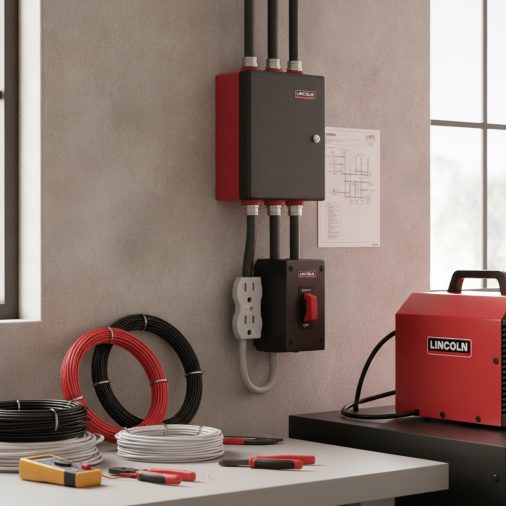
The AC 225 runs on 230-volt single-phase AC power, not a standard 120-volt household outlet. Attempting to run it from an undersized circuit or a standard dryer outlet without verifying compatibility is a common and potentially dangerous mistake.
The machine draws up to approximately 50 amps at full output, so a dedicated 50-amp, 230-volt circuit is the correct installation. This requires:
- A dedicated 50-amp double-pole breaker in the main panel
- Appropriately sized wire for the circuit run — typically 6 AWG copper for most residential distances
- A NEMA 6-50 receptacle mounted at the welding location
- Proper grounding of the circuit
If you are not comfortable working inside an electrical panel, have a licensed electrician install the circuit and receptacle. This is not optional — working inside a main panel without proper knowledge and tools carries a serious electrocution risk.
Wiring the Input Power Plug
If your AC 225 does not include a factory-installed power cord, you will need to attach a NEMA 6-50 plug to the machine’s input cord. The NEMA 6-50 is a three-prong, 250-volt, 50-amp plug used on heavy shop equipment.
Most AC 225 units have a fixed input cord with three wires coming out of the machine:
| Wire Color | Function |
|---|---|
| Black | Hot line 1 |
| White (or Red) | Hot line 2 |
| Green | Equipment ground |
Important: In a 240-volt two-hot-line circuit like this, both the black and white wires carry 120 volts to ground. Neither is a neutral. Both connect to the hot terminals in the plug.
Inside a NEMA 6-50 plug, you will find three terminals:
- X and Y terminals — these accept the two hot wires (black and white)
- G terminal — this accepts the green ground wire
Steps to wire the plug:
- Strip approximately ¾ inch of insulation from each of the three wires.
- Connect the black wire to the X terminal and tighten the screw firmly.
- Connect the white wire to the Y terminal and tighten the screw firmly.
- Connect the green wire to the G terminal.
- Secure the cord grip or strain relief so the cord cannot be pulled free.
- Close the plug housing and tighten all screws.
Do not swap the ground wire into a hot terminal. The ground wire must connect only to the G terminal on the plug and to the grounding conductor in the circuit. An improperly wired ground creates a shock hazard that may not immediately trip a breaker.
Verify the plug wiring against the machine’s operator manual before applying power. The Lincoln Electric AC 225 operator manual is available free of charge from Lincoln Electric’s website if yours is missing.
Connecting the Welding Leads to the Output Terminals
With the machine unplugged from power, connect the electrode holder lead and the work clamp lead to the two output terminals on the front of the AC 225.
The output terminals are large threaded posts or twist-lock connectors depending on the version. Most commonly they are heavy-duty screw-type terminals.
- Thread the connector on each welding lead onto one of the two output posts.
- Tighten each connector until snug — a loose connection causes voltage drop, arc instability, and heat buildup at the terminal.
- It does not matter which lead goes to which terminal on an AC machine. Because the current alternates 60 times per second, there is no fixed positive or negative output.
The lead length can affect voltage drop at high amperage, so use the shortest leads that comfortably reach your work. Standard 10-foot or 15-foot leads are adequate for most workshop applications.
If you need to extend the leads significantly, use appropriately rated welding cable — undersized or household extension cords are not safe substitutes. For a more detailed look at the full setup process, this step-by-step Lincoln stick welder setup guide covers everything from machine positioning to first-pass settings.
Amperage Range and the Output Tap Selector
The AC 225 uses a large rotary dial or a series of tapped output studs to set the welding amperage. Depending on the production year, the machine either has:
- A continuous rotary range selector dial
- A tapped terminal strip with multiple output positions labeled by amperage range
If your machine has the tapped terminal strip, the welding lead connects to one of the numbered output studs rather than a single fixed terminal. Moving the lead between studs changes the amperage range available on the secondary adjustment control. Always disconnect from power before moving a lead between output taps.
The AC 225 typically produces an output range of approximately 40 to 225 amps. Electrode selection and material thickness determine where in that range you should operate. For common mild steel electrodes on typical shop material:
| Electrode | Diameter | Approximate Amperage Range |
|---|---|---|
| E6013 | 3/32 in | 40–80 A |
| E6013 | 1/8 in | 75–130 A |
| E6011 | 1/8 in | 75–125 A |
| E7018 | 1/8 in | 100–150 A |
| E7018 | 5/32 in | 130–200 A |
These are starting ranges. Actual settings depend on joint type, position, material thickness, and fit-up. The stick welding amperage chart on this site provides a more complete reference by rod size and material thickness.
Safety Gear and Workshop Precautions
Before striking an arc, confirm that your workspace and PPE are properly prepared:
- Welding helmet — minimum shade 10 lens for stick welding at the AC 225’s output range
- Safety glasses — worn under the helmet and when chipping slag
- Welding gloves — heavy leather gauntlet style
- Flame-resistant clothing — no synthetic fabrics, no exposed skin near the arc
- Leather boots — no open-toed shoes or sneakers
- Ventilation — adequate fresh air movement or a fume extraction system; the AC 225 produces significant fume volume at higher amperages
- Fire prevention — remove combustibles from the work area; have a fire extinguisher accessible
The AC 225 output terminals carry welding-level voltage when the machine is powered on. Never handle bare connectors, bare electrode ends, or the work clamp with bare hands while the machine is switched on.
Keep the machine dry. The AC 225 is an open-core transformer design with ventilation slots on the case. Do not operate it in rain or set it on a wet surface.
Verifying the Connection Before First Use
Once the leads are connected and the plug is wired, do a quick verification before welding:
- Confirm the power switch is in the off position.
- Plug into the 230-volt receptacle.
- Turn the machine on and listen — the transformer hum should be steady and quiet without buzzing or crackling.
- Set the amperage selector to a mid-range position.
- Connect the work clamp to clean bare metal on your workpiece.
- Insert an electrode into the holder at approximately 45 degrees, tighten the jaws, and verify the hold is firm.
- Lower your helmet, strike the arc on a scrap piece, and verify the arc establishes cleanly.
A common first-use issue is an arc that refuses to start or immediately sticks the electrode. This is almost always a setting that is too low for the electrode diameter, or a work clamp connected to painted, rusted, or coated metal. If your stick welder won’t arc at all, check the clamp connection and the amperage setting before assuming a wiring problem.
FAQ
Can I use the Lincoln AC 225 with DC electrodes like E6010?
The AC 225 outputs alternating current only. E6010 electrodes are designed for DC (typically DCEP) and do not perform reliably on AC machines. Use E6011 instead, which is specifically formulated to run on AC power. E6013 and E7018 also run acceptably on AC. Attempting E6010 on an AC-only machine typically results in a difficult, unstable arc with poor penetration.
What size wire should I use for the 230-volt circuit feeding the AC 225?
For most residential circuit runs under 50 feet, 6 AWG copper wire rated for 240 volts is standard for a 50-amp circuit. Longer runs may require 4 AWG to compensate for voltage drop. Always follow your local electrical code and the National Electrical Code (NEC) requirements. When in doubt, have a licensed electrician size the wire and install the circuit.
Does polarity matter when connecting the leads on the AC 225?
No. Because the AC 225 outputs alternating current, the current direction reverses 60 times per second. There is no fixed positive or negative terminal, so the electrode holder and work clamp can be connected to either output terminal without affecting weld performance. Polarity selection is a DC concept and does not apply to this machine.
Why does the arc feel harsh or the electrode keeps sticking?
On the AC 225, electrode sticking at the start almost always means the amperage is set too low for the rod diameter. Increase the amperage in increments until the arc establishes and holds without sticking. A harsh, spattery arc with aggressive penetration usually means the setting is too high. Also verify that the work clamp has a solid connection to clean, bare metal — paint, rust, and mill scale create resistance that destabilizes the arc.
What NEMA plug does the Lincoln AC 225 use?
The AC 225 uses a NEMA 6-50 plug — a three-prong, 250-volt, 50-amp configuration. This is a standard heavy-equipment plug commonly used on welders and plasma cutters in shop environments. Do not attempt to use a NEMA 14-30 dryer plug or any 120-volt adapter. The machine requires both hot legs of a 240-volt circuit plus a ground.
Can I run the Lincoln AC 225 from a generator?
Yes, but the generator must be rated for at least 8,000 to 10,000 watts continuous output with a 240-volt, 50-amp outlet to handle the AC 225 at higher amperage settings. Running the welder at lower amperages with smaller electrodes reduces the generator load. Confirm the generator output voltage stays stable under load — voltage fluctuation from an undersized generator causes arc instability and may damage the machine over time.
Why does the machine hum loudly or vibrate more than expected?
A moderate transformer hum is normal on the AC 225 — it is a magnetic-core transformer that inherently produces 60 Hz audible noise. Loud buzzing, rattling, or excessive vibration can indicate loose internal laminations in the transformer core, which is a known characteristic of older units and does not always indicate a fault. If the noise is accompanied by tripped breakers, burning smell, or visible arcing inside the case, stop using the machine and have it inspected before continuing.
Getting to First Arc Without Complications
The AC 225 is a straightforward machine, but electrical wiring errors and poor lead connections are the two most common reasons a freshly set-up unit underperforms or trips a breaker. Verify the plug wiring against the machine’s operator manual, confirm the output terminals are tight, and connect the work clamp to clean bare metal every time. Those three steps resolve the majority of first-use problems before they become troubleshooting sessions.