
You’ve got a piece of 1/8″ mild steel in front of you and an Aimco 130 on the bench. Getting the voltage and wire speed dialed in correctly makes the difference between a solid, clean bead and a frustrating session full of burn-through or cold laps.
For welding 1/8″ (approximately 3.2 mm) mild steel with an Aimco 130 flux-core welder, a good starting point is the higher voltage range the machine offers — typically the maximum or near-maximum voltage tap — with a wire-feed speed in the range of 3 to 4 on the machine’s dial. Because the Aimco 130 is a flux-core unit running 0.030″ or 0.035″ self-shielded wire, polarity must be set to DCEN (electrode negative). Always check the settings chart printed inside the machine’s wire-feed compartment door, as that chart is calibrated specifically for this machine.
What the Aimco 130 Is and What It Can Handle
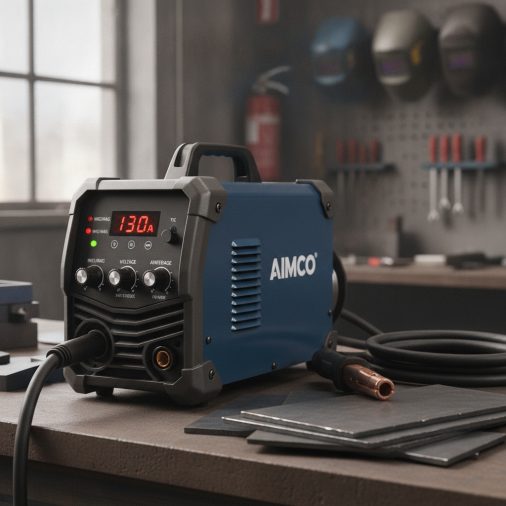
The Aimco 130 is a compact, single-phase flux-core wire-feed welder designed for light fabrication, home repair, and general-purpose mild steel work. It runs self-shielded flux-core wire without requiring an external shielding gas cylinder, which makes it a practical choice for garage and outdoor use.
At 1/8″ steel, this machine is working near the upper end of its comfortable capacity. Most compact 130-amp class flux-core welders can handle 1/8″ steel on a single pass with good technique, but expect to work carefully — heat builds quickly at this thickness if you move too slowly.
Polarity Setting: Get This Right First
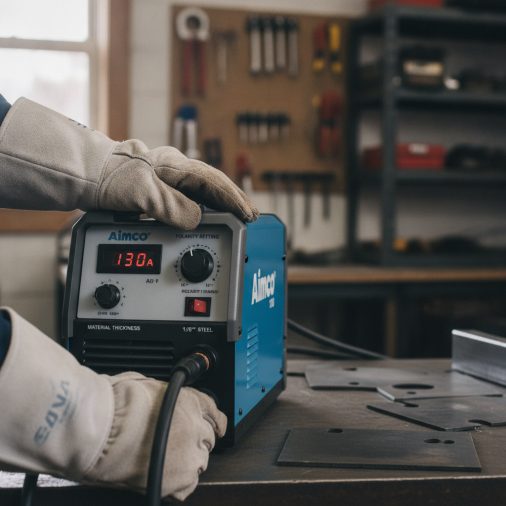
Self-shielded flux-core wire requires DCEN — direct current electrode negative. On most compact welders, this means the gun lead connects to the negative terminal and the work clamp connects to the positive terminal.
Running DCEN with self-shielded wire keeps the arc characteristics correct for the flux chemistry built into the wire. If the leads are reversed to DCEP (electrode positive), you’ll notice excessive spatter, a sputtering arc, and poor fusion — the weld simply won’t perform as it should.
Check your lead connections before adjusting any other setting. Incorrect polarity is one of the most common and easily overlooked reasons a flux-core weld looks and sounds wrong from the first strike.
Starting Settings for 1/8″ Steel
The Aimco 130 uses a stepped voltage selector rather than a continuously adjustable voltage knob. For 1/8″ steel, use the highest voltage setting available. Pair that with a wire-feed speed in the middle-to-upper range of the dial — typically around 3 to 4 out of 10, though this varies by wire diameter and specific machine condition.
Use the table below as a reference starting point. Adjust from there based on what you see and hear.
| Variable | Starting Point |
|---|---|
| Voltage | High (maximum tap) |
| Wire Feed Speed | 3–4 (on a 1–10 scale) |
| Wire Diameter | 0.030″ or 0.035″ flux-core |
| Polarity | DCEN (electrode negative) |
| Material Thickness | 1/8″ (3.2 mm) mild steel |
| Travel Speed | Steady, moderate pace |
These are approximate starting values. The machine’s door chart is the most reliable reference for this specific unit, as it accounts for the machine’s actual output characteristics.
What a Correct Arc Sounds and Looks Like
A well-set flux-core arc on 1/8″ steel produces a consistent crackling or frying sound — often described as bacon sizzling. The weld pool should be clearly visible, fluid, and moving with the gun in a controlled way.
If the arc sounds like it’s popping or sputtering erratically, wire-feed speed may be too low, or the wire may be feeding inconsistently. If you hear a loud buzzing and the wire keeps burning back toward the tip, wire-feed speed is likely too low for the voltage setting.
A smooth bead on 1/8″ steel should show good tie-in at both toes, a reasonably flat crown, and consistent width from start to finish. Understanding how wire speed and voltage interact helps you make smarter adjustments instead of guessing at random.
Preparing the Steel Before You Strike the Arc
Surface condition matters more than most beginners expect. Mill scale, rust, paint, oil, and moisture all disrupt the arc and promote porosity — small gas pockets trapped inside the weld that weaken it.
Clean the weld area with an angle grinder or flap disc down to bright metal. Wipe off any grinding residue or machining oils with a clean rag before welding.
Fit-up quality also affects the result. Gaps wider than about 1/16″ on a butt joint make burn-through more likely at 1/8″ thickness with a machine at maximum output. Tight, consistent fit-up gives the weld pool solid material to fuse into on both sides.
Adjusting for Common Results on 1/8″ Steel
If the first bead doesn’t look right, adjust one variable at a time. Changing voltage and wire speed simultaneously makes it harder to identify which adjustment actually improved the result.
Excessive spatter — Lower the voltage one step if available, or slightly increase wire-feed speed. Also check polarity and ensure the wire is feeding smoothly with no kinks in the liner.
Cold, ropy bead that sits on top of the metal — Increase voltage or slow your travel speed slightly to allow more heat into the joint. A cold bead often indicates insufficient fusion at the toes.
Burn-through or holes — Increase travel speed, reduce wire feed, or consider a weave pattern that keeps the gun moving rather than dwelling. On 1/8″ steel at maximum voltage, travel speed control becomes especially important.
Porosity (pinholes in the weld bead) — Clean the base metal more thoroughly. Also check that the wire spool is dry and the wire surface shows no oxidation. Self-shielded flux-core wire is more tolerant of outdoor conditions than bare MIG wire, but heavily contaminated base metal still causes porosity.
For a broader reference, a complete welding parameter chart for different steel types and thicknesses can help you understand where 1/8″ steel falls within the larger picture of heat input and settings.
Gun Angle and Travel Direction
Hold the gun at approximately 10–15 degrees from vertical, tilting it in the direction of travel. This is a drag angle for flux-core — you pull the gun away from the completed weld, leaving the slag behind the puddle where it belongs.
Pushing the gun (forehand technique) with flux-core tends to trap slag ahead of the puddle and cause inclusion problems. Stick to the drag technique for self-shielded wire on mild steel joints.
Keep the contact-tip-to-work distance at roughly 1/2″ to 3/4″. Holding the gun too far from the surface increases resistance, drops effective heat into the weld, and causes the arc to become unstable.
Safety Checklist Before Welding
Flux-core welding produces more fume and smoke than shielded MIG welding. Work in a well-ventilated area and keep your face out of the fume plume.
– Welding helmet: Auto-darkening or fixed shade 10 lens minimum for flux-core at this amperage
– Gloves: Leather welding gloves rated for arc welding
– Clothing: Flame-resistant or natural-fiber long sleeves — no synthetics
– Eye protection: Safety glasses under the helmet for grinding and cleanup
– Ventilation: Open doors, use a fan to direct fumes away from your breathing zone, or use powered fume extraction
– Fire prevention: Clear combustibles from the work area; have a fire extinguisher accessible
– Grounding: Secure the work clamp as close to the weld zone as practical on clean metal
Self-shielded flux-core produces slag that must be chipped and wire-brushed after each pass. Wear safety glasses during cleanup — slag chips can be surprisingly fast and sharp.
Duty Cycle and Heat Management
Compact 130-amp class machines typically carry a duty cycle of around 20–30% at or near maximum output. In practical terms, that means roughly 2–3 minutes of welding followed by a rest period to prevent overheating the transformer and internal components.
On 1/8″ steel at the highest voltage setting, the machine is working hard. Keep individual weld runs reasonable in length, allow the machine to cool between passes, and watch for the thermal overload indicator if the machine has one.
Exceeding duty cycle doesn’t just risk damaging the welder — it also affects arc quality as internal components overheat. If the arc becomes noticeably weaker or inconsistent mid-bead, stop and allow the machine to cool before continuing.
FAQ
What wire diameter should I use in the Aimco 130 for 1/8″ steel?
Most Aimco 130 machines are set up to run 0.030″ or 0.035″ self-shielded flux-core wire. For 1/8″ steel, either diameter works, though 0.035″ wire deposits slightly more metal per pass and suits thicker material a little better. Check the machine documentation or drive-roll markings to confirm which diameter is installed and compatible with the feed system in your unit.
Do I need shielding gas with the Aimco 130?
No. The Aimco 130 is designed for self-shielded flux-core wire, which generates its own shielding through the flux contained inside the wire itself. No external gas cylinder is required. Do not attempt to run bare solid MIG wire without shielding gas in this machine — bare wire requires gas coverage to protect the weld pool and the machine is configured for flux-core operation.
Why is my Aimco 130 producing excessive spatter on 1/8″ steel?
The most common causes are incorrect polarity (should be DCEN for self-shielded flux-core), voltage too high for the wire-feed speed, or contaminated base metal. Check polarity first — it’s the most frequently overlooked variable on compact flux-core machines. If polarity is correct, try reducing voltage slightly or increasing wire-feed speed a small amount to stabilize the arc. Clean base metal also significantly reduces spatter.
Can the Aimco 130 handle multiple passes on 1/8″ steel?
Yes, but monitor duty cycle carefully. A second pass increases heat input into the joint and into the machine. Allow the weld area to cool between passes so you don’t distort thinner sections of the base metal, and allow the machine to rest to avoid triggering thermal overload. A single well-placed pass is usually sufficient for a fillet weld on 1/8″ steel when settings and technique are correct.
What’s the correct contact-tip-to-work distance for flux-core on this machine?
For self-shielded flux-core wire on a compact machine like the Aimco 130, maintain approximately 1/2″ to 3/4″ (12–19 mm) of wire stickout from the contact tip to the base metal. Longer stickout increases electrical resistance in the wire, which can affect arc stability and apparent heat at the weld. Shorter stickout risks tip damage and erratic arc behavior. Staying in this range keeps arc performance consistent.
Is 1/8″ steel too thick for the Aimco 130?
Not for single-pass fillet welds or lap joints, but the machine is working near its upper capacity. Flat and horizontal positions are most manageable. Overhead or vertical welding at 1/8″ will be more challenging because the machine is at or near maximum output and puddle control becomes harder. For repetitive production welding of 1/8″ material or thicker, a higher-capacity machine would provide more comfortable headroom and better duty cycle.
How do I know if my weld on 1/8″ steel has good fusion?
Visual inspection gives some indication — look for clean tie-in at both toes of the bead with no overlap or undercut, consistent bead width, and no visible porosity. A convex bead that sits high and narrow often suggests insufficient fusion. However, visual appearance alone cannot confirm internal fusion or structural integrity. For load-bearing or safety-critical applications, rely on qualified procedures and appropriate inspection methods rather than appearance alone.
Getting Consistent Results from Here
The Aimco 130 is capable of solid welds on 1/8″ mild steel when set correctly. The most important starting steps are confirming DCEN polarity, selecting the high voltage tap, cleaning the base metal thoroughly, and maintaining a consistent drag angle and travel speed. From that baseline, adjust wire-feed speed in small increments until the arc sounds smooth and the bead ties in cleanly at both toes. The machine’s internal door chart is always worth checking — it’s calibrated for this specific unit and is a more reliable reference than settings copied from a different machine or wire diameter.