
MIG welding is one of the most practical skills you can pick up for metalwork, fabrication, or basic repairs. Whether you’re fixing a cracked frame, building a bracket, or tackling an automotive project, a MIG welder gives you speed, control, and results you can actually be proud of.
MIG welding works by feeding a wire electrode through a gun while shielding gas protects the weld pool from contamination. To weld, you set your voltage and wire speed for the material thickness, clamp the ground to clean metal, hold the gun at roughly 15–20 degrees, and pull or push the trigger while moving steadily along the joint. The wire melts on contact with the arc and fuses the base metals together.
What You Need Before You Start
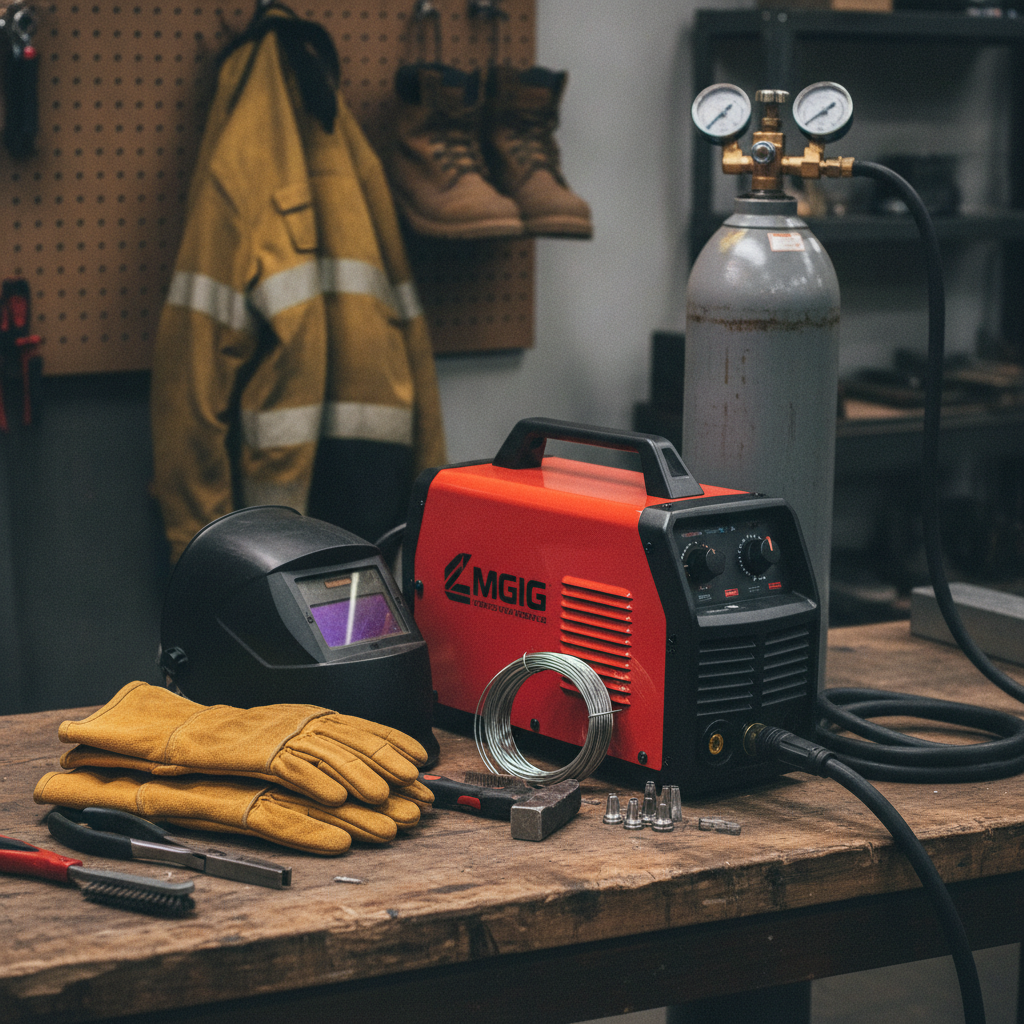
Getting the setup right matters more than most beginners expect. A poor ground connection or wrong shielding gas can ruin a weld before you even strike an arc.
Equipment checklist:
- MIG welder (gas or gasless/flux-core capable)
- Shielding gas (typically 75% argon / 25% CO2 for mild steel)
- Welding wire (ER70S-6 is a solid all-around choice for mild steel)
- Auto-darkening welding helmet
- MIG welding gloves
- Wire brush and angle grinder
- C-clamps or welding magnets
- Safety glasses for grinding
For a beginner-friendly machine that’s easy to configure, the Lincoln Electric Weld-Pak 140 is a commonly recommended entry-level option — it handles both gas and flux-core wire and runs on standard 120V household current.
Understanding Polarity and Shielding Gas
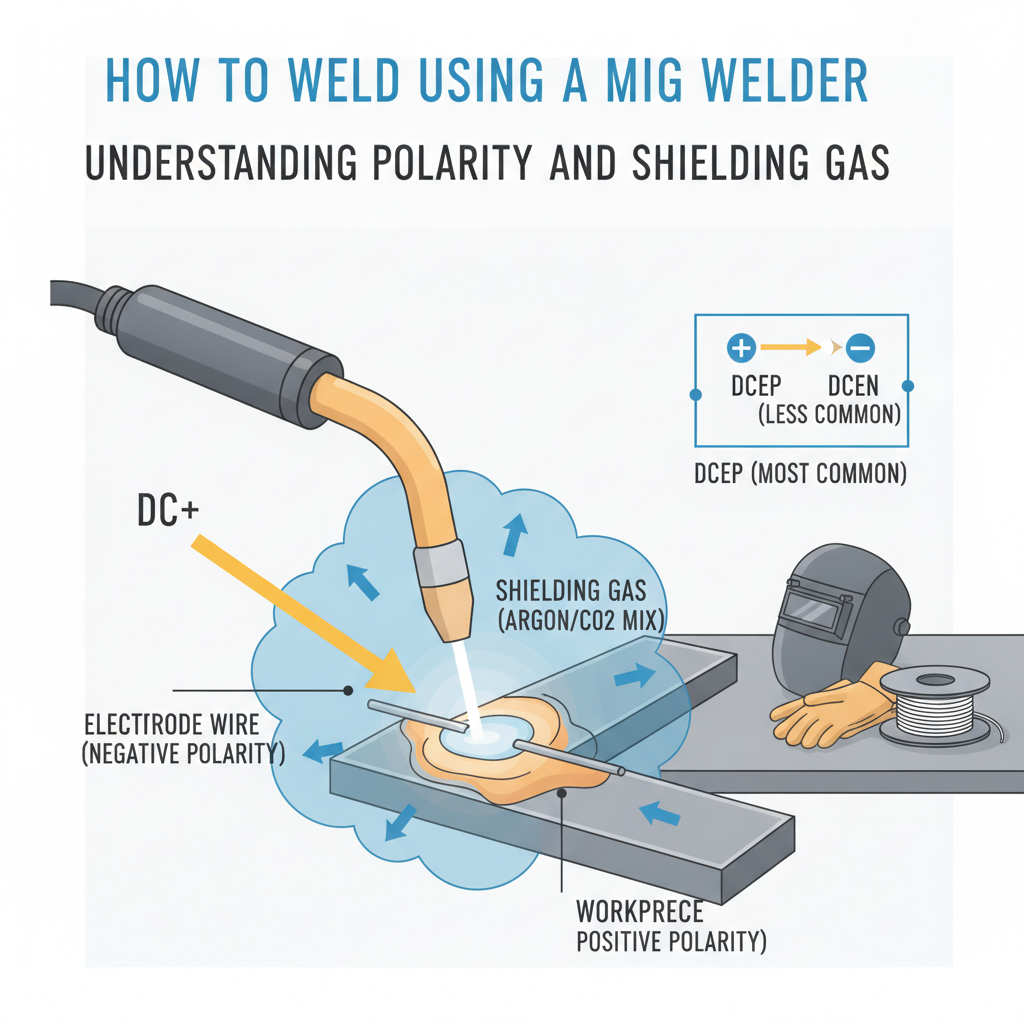
Before loading wire or striking an arc, you need to confirm your welder is configured correctly for the wire you’re using.
DCEP (Direct Current Electrode Positive) is standard for solid wire MIG welding with gas. The electrode connects to the positive terminal, and your ground clamp connects to negative. This setup produces a stable arc and clean penetration.
If you’re using flux-core wire without gas, most machines require DCEN (electrode negative). Swapping polarity incorrectly leads to a spitty, unstable arc and poor fusion. Understanding MIG welding polarity and how it affects your weld is worth a few minutes of reading before your first run.
Shielding gas flow rate typically runs between 15–25 CFH (cubic feet per hour). Too low and you get porosity; too high and you waste gas while creating turbulence in the weld pool.
How to Set Up Your MIG Welder
Proper setup takes five minutes and saves hours of troubleshooting later.
- Install the wire spool — Thread the wire through the drive roller and into the liner. Make sure the drive roller groove size matches your wire diameter (0.030″ or 0.035″ are most common for mild steel).
- Set drive roller tension — Tight enough to feed consistently, loose enough to slip if the wire jams. A common test: the wire should stop if you press your thumb against the spool.
- Connect shielding gas — Attach the regulator to your gas cylinder, connect the hose to the welder, and set flow rate to around 20 CFH to start.
- Set voltage and wire speed — Most machines have a chart inside the door panel based on material thickness and wire size. Use it as your starting point.
- Clamp the ground close to the weld area — Direct, low-resistance grounding keeps your arc stable.
For a detailed walkthrough of connecting gas and setting flow correctly, setting up a MIG welder with gas covers the process step by step.
MIG Welder Settings by Material Thickness
This quick-reference table covers typical starting settings for mild steel using ER70S-6 wire and 75/25 Ar/CO2 gas.
| Material Thickness | Wire Diameter | Voltage (V) | Wire Speed (IPM) |
|---|---|---|---|
| 18 gauge (0.048″) | 0.023″ | 13–15 | 160–180 |
| 16 gauge (0.060″) | 0.030″ | 15–17 | 170–200 |
| 1/8″ (0.125″) | 0.030″ | 17–19 | 200–240 |
| 3/16″ (0.188″) | 0.035″ | 18–20 | 220–260 |
| 1/4″ (0.250″) | 0.035″ | 20–22 | 240–280 |
These are starting points, not absolutes. Always run a test bead on scrap metal of the same thickness before welding your actual workpiece.
How to Weld: Step-by-Step
Once your machine is set up and you’ve tested settings on scrap, here’s the actual welding process.
Step 1: Prepare the metal
Clean metal is non-negotiable. Grind or wire-brush away rust, paint, oil, and mill scale within at least an inch of the joint. Contamination causes porosity, spatter, and weak fusion.
Step 2: Position and tack
Use clamps and welding magnets to hold pieces in alignment. Run short tack welds at intervals along the joint to lock everything in place before running your full weld pass.
Step 3: Position the gun
Hold the gun at a 15–20 degree work angle relative to the joint. For a flat fillet weld, split the angle between both pieces at roughly 45 degrees. Keep the nozzle 3/8″ to 1/2″ away from the metal.
Step 4: Push or pull?
- Push (forehand): Gun angled toward the direction of travel. Produces a flatter, wider bead with shallower penetration. Good for thinner material.
- Pull (backhand): Gun angled away from direction of travel. Produces a narrower bead with deeper penetration. Better for thicker stock.
Step 5: Maintain a steady travel speed
Squeeze the trigger, establish the arc, then move at a pace that keeps the weld puddle roughly two times the width of your wire. Moving too fast produces a narrow, underfilled bead. Moving too slow piles up metal and risks burn-through.
Step 6: Watch the puddle, not the arc
Focus your eyes on the leading edge of the weld pool, not the bright arc itself. The puddle tells you whether you’re adding the right amount of heat and fill.
Step 7: Release and inspect
Release the trigger at the end of the joint. Let the bead cool for a moment, then chip any spatter and wire-brush the bead. A good weld looks uniform, slightly convex, with consistent width and no visible holes or voids.
Weld Joint Types You’ll Use Most
Different joints require slightly different technique and setup.
| Joint Type | Common Use | Key Consideration |
|---|---|---|
| Butt joint | Sheet metal, plate | Fit-up gap matters; too wide causes burn-through |
| Fillet (T-joint) | Frames, brackets | Split angle evenly between both pieces |
| Lap joint | Auto body, overlapping panels | Risk of burn-through on top piece |
| Corner joint | Box sections, tubing | Watch for cold fusion at the outer edge |
Common MIG Welding Problems and How to Fix Them
Even experienced welders run into these regularly.
Porosity (holes in the weld)
- Cause: Contaminated metal, bad gas coverage, or too much/too little gas flow
- Fix: Clean metal thoroughly, check gas connections, adjust flow rate to 18–22 CFH
Excessive spatter
- Cause: Voltage too low, wire speed too high, or dirty metal
- Fix: Increase voltage slightly or decrease wire speed; clean base metal
Burn-through
- Cause: Too much heat on thin material
- Fix: Reduce voltage, increase travel speed, use tack welds and skip around the joint rather than running continuous beads. If you’re frequently welding sheet metal or exhaust components, MIG welding thin metal without burning through covers the specific techniques in detail.
Cold lap (poor fusion at edges)
- Cause: Travel speed too fast or voltage too low
- Fix: Slow down slightly, increase voltage, keep gun angle consistent
Bird-nesting (wire tangling at drive roll)
- Cause: Drive roll tension too tight, worn liner, wire kinking
- Fix: Reduce tension, inspect liner for wear, check wire spool feeds freely
If you’re dealing with persistent machine issues beyond settings, diagnosing why your MIG welder isn’t working walks through the most common mechanical and electrical causes.
Practical Tips That Actually Improve Results
These aren’t obvious from reading a manual.
- Never skip scrap test beads. Material from the same batch may behave differently from your last project.
- Trim the wire to 3/8″ before each arc start. Burnt or balled wire tips cause inconsistent arc starts.
- Keep anti-spatter spray on your nozzle. It prevents buildup that disrupts gas flow and makes cleanup faster.
- Tack often on long joints. Heat warps metal. Tacking at intervals distributes stress before running a full pass.
- Control the workpiece temperature. On thin metal, let each section cool slightly between passes to prevent heat buildup.
- Use the right wire for your material. ER70S-6 has a higher deoxidizer content and handles slightly dirty metal better than ER70S-3, making it the preferred choice for general fabrication and repair work.
The YESWELDER 205A is another machine worth noting if you anticipate multi-process work — it handles MIG, flux-core, TIG, and stick in one unit, which is useful when projects vary widely in material and thickness.
Safety Essentials
MIG welding produces UV radiation, fumes, and spatter hot enough to start fires.
- Always wear an auto-darkening helmet rated at least shade 10 for MIG
- Keep a fire extinguisher within reach
- Weld in a ventilated area — fume exposure over time is a genuine health risk
- Remove flammable materials from the work area
- Let metal cool before handling; freshly welded joints hold heat longer than they appear to
FAQ
What gas should I use for MIG welding mild steel?
The most versatile option for mild steel is a 75/25 argon/CO2 blend, often called C25. It produces stable arcs, low spatter, and clean-looking welds across a wide range of thicknesses. Pure CO2 is cheaper and gives deeper penetration but generates more spatter and a rougher bead appearance. For thinner gauge material, higher argon mixes (90/10 or 98/2) reduce heat input and spatter further.
How do I know if my MIG welder settings are correct?
The best indicator is sound. A correctly tuned MIG weld sounds like steady, consistent bacon frying. Popping and sputtering usually means voltage is too low or wire speed is too high. A loud, harsh crackle often means voltage is too high. Run test beads on scrap and adjust until you get that smooth, continuous sizzle.
Can I MIG weld without gas using regular solid wire?
No. Solid MIG wire requires shielding gas to protect the weld pool from atmospheric contamination. Without gas, you’ll get severe porosity and poor fusion. If you want to weld without a gas cylinder, switch to flux-core wire, which contains its own flux-based shielding. You’ll also need to swap polarity to DCEN on most machines.
What causes my MIG welds to look lumpy and uneven?
Lumpy, inconsistent beads are usually caused by inconsistent travel speed, an incorrect gun angle, or wire speed that’s too high relative to voltage. Slowing down your travel speed and maintaining a steady gun angle often solves this immediately. Make sure your work surface is flat and your ground clamp is connected to clean metal close to the weld zone.
How thick of metal can a 140-amp MIG welder handle?
A 140-amp machine running on 120V can typically weld mild steel up to about 3/16″ in a single pass under ideal conditions. Most manufacturers rate them at around 1/4″ with multiple passes, though results vary based on machine duty cycle and material preparation. For structural work on thicker material, a 220V machine in the 200–250 amp range gives you more headroom.
Is MIG welding good for auto body repair?
Yes, MIG welding is widely used for auto body work, particularly on floor pans, patch panels, and structural repairs. The key challenge is heat control on thin sheet metal, typically 18–22 gauge. Short stitch welds rather than continuous runs help manage distortion. welding body panels and managing thin metal heat distortion is a useful reference if you’re tackling automotive sheetwork.
Do I need to preheat metal before MIG welding?
For standard mild steel under 1/2″, preheating isn’t necessary in most shop conditions. Thicker stock, high-carbon steel, or work in cold environments (below 32°F/0°C) can benefit from preheating to 150–300°F to prevent cracking and improve fusion. Stainless and cast iron have their own preheat requirements and behave differently from mild steel.
Getting clean, strong MIG welds consistently comes down to three things: clean metal, correct settings, and steady technique. The machine itself rarely causes problems once setup is dialed in. Practice on scrap before welding anything structural, and pay attention to what the weld pool is telling you — it’s a more reliable feedback signal than the arc itself.