
Getting started with welding at home raises a lot of practical questions — which process to use, what machine to buy, how to set up a safe workspace, and what you can realistically weld without formal training. The answers depend heavily on what you want to build or repair.
For most home welding projects involving mild steel — brackets, frames, carts, gates, automotive repairs — MIG welding (GMAW) or flux-core welding (FCAW) are the most practical starting points. MIG welding produces clean results with a gas-shielded setup, while flux-core works without a shielding gas cylinder, making it portable and suitable for outdoor use. Stick welding (SMAW) is another solid option for thicker mild steel and dirty or rusty metal. TIG welding delivers the best precision but requires significantly more skill and is better suited once you have foundational experience.
Which Welding Process Makes Sense at Home
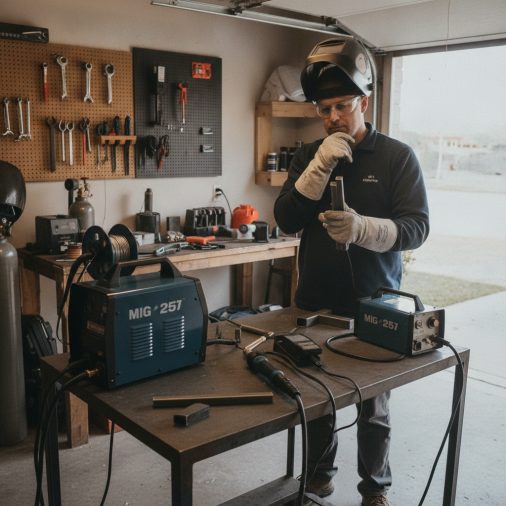
The right process depends on your projects, your budget, your workspace, and how much time you’re willing to invest in learning technique.
| Process | Best For | Shielding Gas | Skill Level | Indoor / Outdoor |
|---|---|---|---|---|
| MIG (GMAW) | Mild steel, thin to medium thickness | Required | Low–Medium | Indoor preferred |
| Flux-Core (FCAW) | Mild steel, thicker sections, rusty metal | Not required | Low–Medium | Indoor or outdoor |
| Stick (SMAW) | Thick mild steel, cast iron, field repairs | Not required | Medium | Indoor or outdoor |
| TIG (GTAW) | Stainless, aluminum, precision work | Required | High | Indoor |
For most beginners, a 120V or 140-amp MIG/flux-core machine offers the best balance of usability and versatility. Machines in this class, such as the Hobart Handler 140, can handle mild steel from thin sheet up to about 3/16 inch in a single pass, which covers the majority of home workshop projects.
If you want to eventually weld stainless steel or aluminum, a multi-process machine capable of MIG, TIG, and stick in one unit gives you room to grow without replacing your equipment.
What You Can Realistically Weld at Home
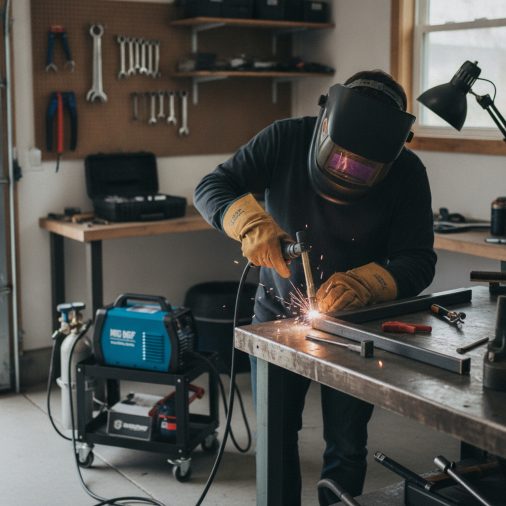
Home welding is well-suited for a broad range of non-structural projects. Common examples include:
- Garden furniture and frames
- Workshop carts, benches, and shelving
- Trailer repairs and mounting brackets
- Automotive exhaust patches and body bracing
- Gate hinges and fence posts
- Firewood racks, bike racks, and tool holders
- Farm equipment repairs on non-critical parts
Mild steel is the most forgiving material for beginners. It’s widely available, affordable, and welds cleanly with standard MIG wire such as ER70S-6 and a C25 shielding gas (75% argon / 25% CO₂). Understanding how shielding gas selection affects your MIG weld is one of the most practical early lessons for a home welder.
For structural work — trailer hitches, roll cages, load-bearing components, pressure-containing parts, or anything vehicle-safety-related — the weld must meet specific performance requirements that appearance alone cannot confirm. Those repairs should involve either a qualified welder working to an approved procedure or a professional inspection.
Setting Up a Safe Home Welding Space
A workable home welding area doesn’t need to be elaborate, but it does need to meet certain practical and safety requirements before you strike an arc.
Ventilation is the most commonly overlooked factor. Welding fumes contain metal oxides and gases that are harmful with repeated or prolonged exposure. Working outdoors or in a well-ventilated garage with doors and windows open is acceptable for mild steel. Welding galvanized metal, painted surfaces, or stainless steel produces more hazardous fumes and requires dedicated fume extraction or a respirator rated for welding fumes. Never rely on a standard dust mask.
Fire prevention matters every time. Clear combustibles from at least a 35-foot radius of the work area. Keep a fire extinguisher accessible and check that sparks cannot reach fuel containers, rags, wood, or insulation. Concrete or bare earth flooring is much safer than a wooden deck.
Electrical safety is relevant even with smaller home machines. Plug your welder into a correctly rated circuit — most 120V MIG machines require a dedicated 20-amp circuit, while 240V machines typically need a 30–50 amp circuit. Check the machine’s manual and your local electrical code.
For a more detailed breakdown of everything involved in organizing a safe and functional space, the article on setting up a home welding workspace for beginners covers the layout, power requirements, and equipment list in practical terms.
Personal Protective Equipment for Home Welding
Home welders need the same protective gear as any other welder. The arc produces UV and infrared radiation intense enough to cause permanent eye damage, and hot metal or spatter can cause serious burns.
At minimum, every home welding session requires:
- A welding helmet with an appropriate auto-darkening or fixed shade lens. Shade 10 is a common starting point for MIG and stick; TIG work at lower amperages may use shade 8–9. Auto-darkening helmets such as the Lincoln Electric Viking 3350 offer adjustable shade and quick-reaction lenses that suit multiple processes.
- Safety glasses worn under the helmet when grinding or chipping slag
- Flame-resistant or leather welding gloves
- Flame-resistant clothing — heavy cotton or leather; no synthetics that melt
- Leather boots that cover the ankle; no open-toed footwear
- Hearing protection when grinding
Ordinary sunglasses provide no meaningful protection against arc flash. Even a brief, unprotected exposure to the arc can cause arc eye — a painful corneal burn that develops hours after exposure.
Machine Settings for Common Home Projects
Settings vary by machine model, material thickness, wire diameter, and joint type. Every machine has a settings chart inside the door panel — that chart is the most reliable starting reference for your specific welder.
As a general starting guide for MIG welding mild steel with 0.030-inch ER70S-6 wire and C25 gas:
| Material Thickness | Approximate Voltage | Approximate Wire Feed Speed | Amperage Range |
|---|---|---|---|
| 18 gauge (1.0 mm) | 14–16V | 150–200 ipm | 40–60A |
| 1/8 inch (3.2 mm) | 17–19V | 250–300 ipm | 90–120A |
| 3/16 inch (4.8 mm) | 19–21V | 300–350 ipm | 120–150A |
These are approximate starting ranges only. Actual settings depend on your specific machine, joint position, fit-up, and wire diameter. Always adjust based on how the arc sounds and how the bead looks — a smooth, consistent buzzing sound and flat bead profile with good fusion at the toes indicates settings are close to correct.
Flux-core welding (FCAW-S) with self-shielded wire such as Lincoln Electric Innershield NR-211-MP uses DCEN (electrode negative) polarity, which is opposite to solid wire MIG. Switching from solid wire to flux-core without changing polarity is one of the most common setup mistakes beginners make. Confirm polarity matches the wire type before running any test beads.
Common Problems Home Welders Run Into
Most early frustrations with home welding trace back to a small number of consistent causes.
Porosity — small gas pockets trapped in the weld — usually means contaminated base metal, insufficient gas coverage, a leaking gas hose, or welding outdoors where wind disrupts the shielding. Clean the metal with a grinder or wire brush before welding and check that gas flow reaches 15–25 cubic feet per hour at the regulator.
Burn-through on thin metal is caused by excessive heat relative to the material thickness. Reduce wire feed speed, increase travel speed, or use a stitch welding technique — short welds with pauses to let heat dissipate — rather than running a continuous bead.
Excessive spatter often points to voltage that’s too low, incorrect polarity for the wire type, or contaminated wire. Check polarity first, then increase voltage slightly and observe whether the arc settles.
Lack of fusion — where the weld bead sits on top of the base metal without properly bonding — typically results from moving too fast, using too little heat, or holding the gun angle at too steep a push angle. Slow down slightly and ensure the arc is directed into the joint, not above it. Understanding how flux-core and MIG welding differ in setup and behavior helps when diagnosing issues specific to each process.
Mild Steel, Stainless, and Aluminum at Home
Most home welders will spend the majority of their time on mild steel, and that’s a practical starting point. Mild steel is tolerant, inexpensive, and widely available in flat bar, angle iron, tubing, and sheet.
Stainless steel is weldable at home, but requires a compatible filler — ER308L for 304 stainless is the common choice — along with a different shielding gas. Tri-mix (argon/helium/CO₂) or a 98% argon / 2% CO₂ blend are typical options. Cross-contaminating stainless with carbon steel tools causes surface rust and can compromise corrosion resistance. Use dedicated brushes and grinding wheels for stainless.
Aluminum requires either a TIG setup or a MIG machine with a spool gun. The oxide layer on aluminum melts at a much higher temperature than the base metal beneath it, so oxide removal with a dedicated stainless steel brush is essential before welding. Using a MIG welder on aluminum is possible but requires the right equipment and technique — it’s not a beginner-friendly starting point.
Cast iron is common in home repair situations — engine blocks, vises, wood stoves — and needs careful handling. Preheating, controlled cooling, and the right filler (nickel-based electrodes such as ENi-CI or ENiFe-CI for stick) are required to prevent cracking. Cast iron repairs on functional equipment are best approached cautiously, and load-bearing cast iron components may warrant professional evaluation.
FAQ
What is the easiest welding process to learn at home?
MIG welding is generally the most accessible starting point for home welders. The machine manages wire feeding automatically, and the technique is relatively forgiving on mild steel. Flux-core welding with a self-shielded wire is a close second — it removes the need for a shielding gas cylinder, which simplifies setup, though slag removal adds a finishing step that MIG solid wire does not require.
Can I weld outdoors at home without a shielding gas cylinder?
Yes. Self-shielded flux-core wire (FCAW-S) doesn’t require an external gas cylinder because the flux in the wire core generates its own shielding during the weld. It handles outdoor conditions and light wind reasonably well. Gas-shielded MIG welding (GMAW) is less suitable outdoors because wind disrupts the shielding gas coverage, causing porosity. Stick welding is also fully suitable for outdoor use.
What thickness of steel can a 120V home MIG welder handle?
Most 120V MIG welders in the 90–140 amp range can weld mild steel up to approximately 3/16 inch (about 4.8 mm) in a single pass. Thinner material down to 18 gauge is achievable with proper settings. For material thicker than 1/4 inch, a 240V machine or multiple weld passes are typically required. Check your specific machine’s rated output — claimed capacity varies between manufacturers.
Do I need a separate circuit for a home welder?
Most 120V welders draw 15–20 amps and should run on a dedicated 20-amp circuit to avoid tripping breakers under load. A 240V machine typically requires a 30–50 amp circuit depending on its rated output. Running a welder on an overloaded shared circuit causes nuisance tripping and can create a fire hazard over time. Confirm the circuit requirements in your machine’s manual and consult a licensed electrician if you’re unsure about your panel capacity.
Is home welding safe for an apartment or attached garage?
An attached garage is workable if it has adequate ventilation — open the door fully and use a fan to pull fumes outward, not recirculate them. An apartment is generally unsuitable due to lack of ventilation, fire risk, and proximity to shared walls and flammable materials. If you’re welding galvanized, coated, or stainless steel, even a well-ventilated attached garage may not be sufficient without dedicated fume extraction equipment.
Can I weld without shielding gas if I already own a MIG welder?
If your machine supports flux-core wire, you can switch to self-shielded FCAW-S wire and weld without gas. You’ll need to change polarity from DCEP (used for solid MIG wire) to DCEN (required for most self-shielded flux-core wires) and remove the gas hose from the circuit. Not all compact MIG machines support both modes — check your machine’s manual before making the switch. The weld process and bead appearance will differ noticeably from gas-shielded MIG. For context on how these two approaches compare in practice, see this breakdown of MIG welding polarity and how it affects results.
Should I use MIG or TIG welding for home automotive work?
MIG welding handles most automotive steel repairs — floor pans, patch panels, frame bracing, and brackets — effectively and quickly. TIG welding offers superior control for thin material and cleaner results on stainless or aluminum exhaust components, but demands more skill and a slower pace. For most home automotive work, MIG is the practical choice. TIG becomes worth considering once your technique is solid and the project demands tighter control over heat input. You can compare both processes in detail with this comparison of MIG and TIG welding differences.
Starting with a reliable machine, sound PPE, proper ventilation, and clean mild steel gives you the best foundation for home welding. Most early problems come down to surface preparation, incorrect polarity, or settings that don’t match the material — not lack of skill. Adjust one variable at a time when troubleshooting, and use your machine’s door chart as the first reference point rather than settings copied from an unrelated source.